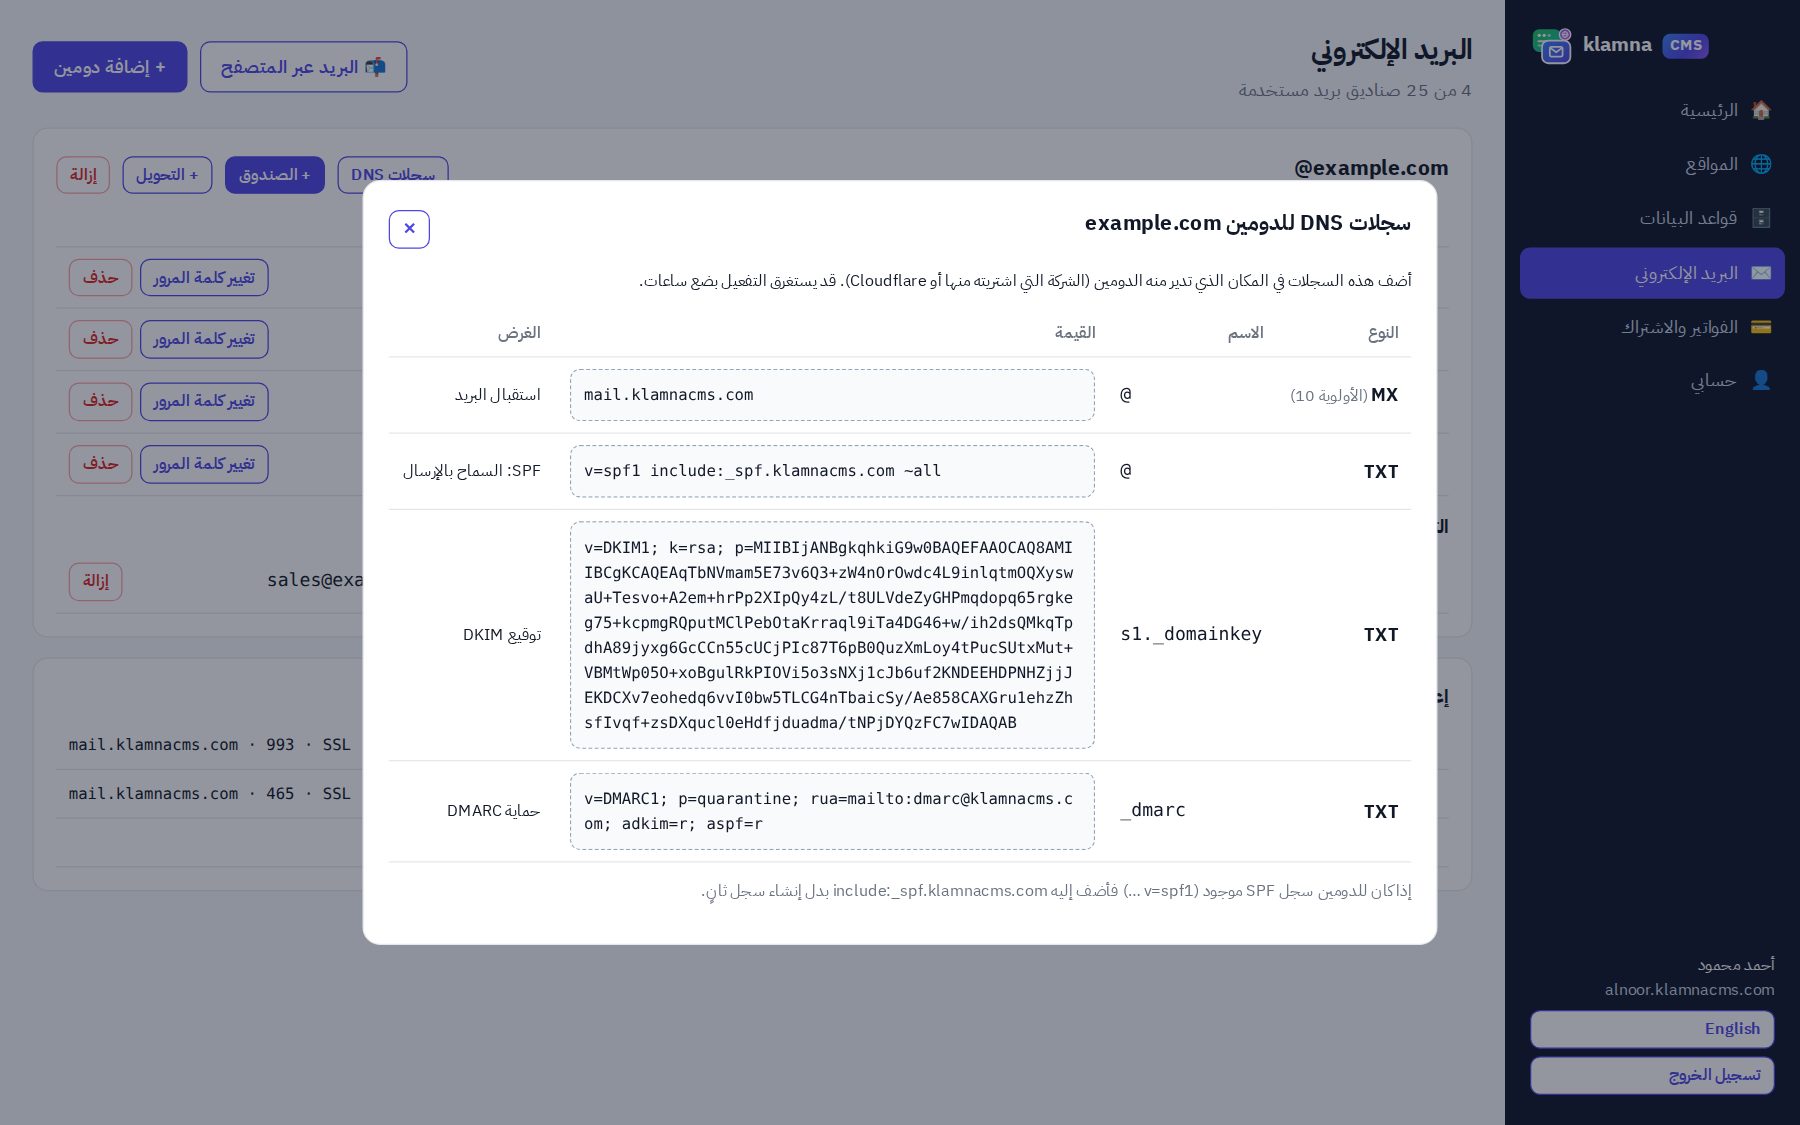
| Type | Name | Value | Purpose |
|---|---|---|---|
| MX | @ | mail.orderatkeg.com (priority 10) | Receive e-mail |
| TXT | @ | v=spf1 include:_spf.orderatkeg.com ~all | SPF |
| TXT | s1._domainkey | The key shown in your panel | DKIM |
| TXT | _dmarc | v=DMARC1; p=quarantine; … | DMARC |
If your domain already has an SPF record, add include:_spf.orderatkeg.com to it instead of creating a second one.
Connect the domain to your website
In Websites press Domains and type your domain, then add these records at your domain company:
| Type | Name | Value |
|---|---|---|
| A | @ | 87.98.131.73 |
| CNAME | www | your free address, e.g. name.orderatkeg.com |
Then press “Check now”: we confirm the domain and add a free SSL certificate automatically. WordPress sites are moved to the new address for you.
Where do I add the records?
- Sign in to the company you bought the domain from and open the domain.
- Find the section called DNS, DNS Zone, Advanced DNS or Manage records.
- Press Add record, pick the type, and type the name and value from the tables above; leave TTL at its default.
- If your DNS service offers a “proxy” option, keep the e-mail records (MX and related) unproxied.
Changes usually spread within minutes and can take a few hours. To understand each record type, read DNS records explained; for e-mail delivery see SPF, DKIM and DMARC.